
ReactJS is a popular JavaScript library used for building user interfaces. It is fast, efficient, and can be used to create a simple blog with ease. In this article, we will discuss the steps to create a simple blog with ReactJS.
Table of Contents
- Introduction
- Setting up the Environment
- Creating the Blog Component
- Designing the User Interface
- Adding Functionality to the Blog
- Retrieving Data from a Server
- Conclusion
- FAQs
Introduction
Blogging is a great way to share your ideas, thoughts, and experiences with the world. With the help of ReactJS, you can create a simple blog that is fast, efficient, and easy to maintain. ReactJS provides a number of benefits for building user interfaces, including a virtual DOM, which makes it easy to update the UI in real-time without reloading the entire page.
Setting up the Environment
Before we get started, you need to set up your environment. You will need to install Node.js, which is a JavaScript runtime that allows you to execute JavaScript code outside of a web browser. You will also need to install npm, which is a package manager for Node.js. Once you have installed Node.js and npm, you can create a new React app using the following command:
lua
npx create-react-app my-blog
This command will create a new React app called “my-blog”. Once the app is created, navigate to the project directory and start the development server by running the following command:
bash
cd my-blog
npm start
This will start the development server and open the app in your default web browser.
Creating the Blog Component
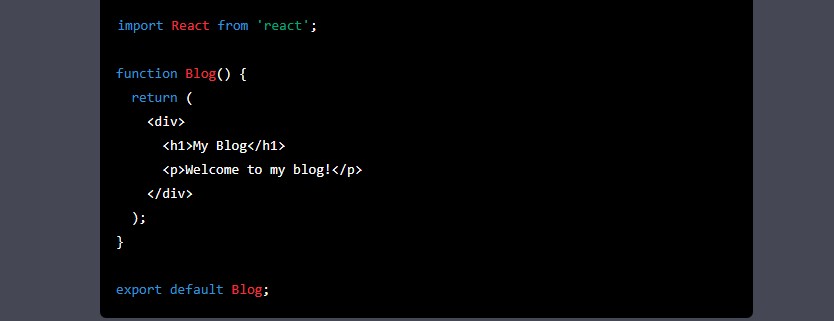
To create the blog component, you will need to create a new file called “Blog.js” in the “src” directory. This file will contain the code for the blog component. In this component, we will define the structure of the blog and its content.
javascript
import React from 'react';

function Blog() {
  return (
    <div>
      <h1>My Blog</h1>
      <p>Welcome to my blog!</p>
    </div>
  );
}

export default Blog;
In this code, we have defined a simple blog component that displays the heading “My Blog” and a welcome message.
Designing the User Interface
Once you have created the blog component, you can start designing the user interface. In this step, we will add some styling to the blog to make it look more appealing. You can use CSS to style the blog or use a CSS framework such as Bootstrap.
javascript
import React from 'react';
import './Blog.css';

function Blog() {
  return (
    <div>
      <h1>My Blog</h1>
      <p>Welcome to my blog!</p>
      <div className="post">
        <h2>Post Title</h2>
        <p>Post Content</p>
      </div>
    </div>
  );
}

export default Blog;
In this code, we have added a CSS file called “Blog.css” and applied some styling to the blog component. We have also added a post section that displays the title and content of a blog post.
Adding Functionality to the Blog
Once you have designed the user interface, you can start adding functionality to the blog. In this step, we will add the ability to create new blog posts and display them on the blog.
javascript
import React, { useState } from 'react';
import './Blog.css';

function Blog() {
  const [posts, setPosts] = useState([]);// Function to handle the form submission
const handleSubmit = (event) => {
event.preventDefault();
const form = event.target;
const title = form.title.value;
const content = form.content.value;
const newPost = { title, content };
setPosts([...posts, newPost]);
form.reset();
};

return (
<div>
<h1>My Blog</h1>
<p>Welcome to my blog!</p>
<form onSubmit={handleSubmit}>
<label htmlFor="title">Title:</label>
<input type="text" id="title" name="title" />
<label htmlFor="content">Content:</label>
<textarea id="content" name="content" />
<button type="submit">Add Post</button>
</form>
{posts.map((post, index) => (
<div key={index} className="post">
<h2>{post.title}</h2>
<p>{post.content}</p>
</div>
))}
</div>
);
}

export default Blog;
In this code, we have added a form to create new blog posts. When the form is submitted, we create a new post object and add it to the “posts” state array using the “setPosts” function. We then display all the posts using the “map” function.
Retrieving Data from a Server
Finally, if you want to retrieve data from a server and display it on your blog, you can use the “fetch” API to make HTTP requests to a server. In this example, we will retrieve data from a mock server that returns a list of blog posts.
javascript
import React, { useState, useEffect } from 'react';
import './Blog.css';

function Blog() {
  const [posts, setPosts] = useState([]);

  useEffect(() => {
    fetch('https://my-blog-api/posts')
      .then(response => response.json())
      .then(data => setPosts(data))
      .catch(error => console.error(error));
  }, []);

  const handleSubmit = (event) => {
    event.preventDefault();
    const form = event.target;
    const title = form.title.value;
    const content = form.content.value;
    const newPost = { title, content };
    setPosts([...posts, newPost]);
    form.reset();
  };

  return (
    <div>
      <h1>My Blog</h1>
      <p>Welcome to my blog!</p>
      <form onSubmit={handleSubmit}>
        <label htmlFor="title">Title:</label>
        <input type="text" id="title" name="title" />
        <label htmlFor="content">Content:</label>
        <textarea id="content" name="content" />
        <button type="submit">Add Post</button>
      </form>
      {posts.map((post, index) => (
        <div key={index} className="post">
          <h2>{post.title}</h2>
          <p>{post.content}</p>
        </div>
      ))}
    </div>
  );
}

export default Blog;
In this code, we have used the “useEffect” hook to fetch data from a mock server when the component mounts. We then set the “posts” state array to the fetched data.
Conclusion
In conclusion, creating a simple blog with ReactJS is easy and straightforward. You can use ReactJS to create a fast and efficient blog with a great user interface. With the steps outlined in this article, you can create your own simple blog in no time.
FAQs
- What is ReactJS? ReactJS is a popular JavaScript library used
- to create dynamic user interfaces and build web applications.
- Do I need to know HTML and CSS to use ReactJS? Yes, knowing HTML and CSS is essential when working with ReactJS. While ReactJS focuses on the functionality and interactivity of web applications, HTML and CSS provide the structure and styling of web pages.
- Can I use ReactJS to create a blog that interacts with a server? Yes, you can use ReactJS to create a blog that retrieves and stores data on a server. ReactJS is flexible and can work with various server-side technologies such as Node.js, PHP, and Ruby on Rails.
- How can I make my ReactJS blog more SEO-friendly? To make your ReactJS blog more SEO-friendly, you can use techniques such as including relevant keywords in your content, optimizing your images and videos, and ensuring your website has a fast page load speed. You can also use meta tags and descriptions to improve your website’s search engine visibility.
- Can I use ReactJS to create a mobile application? Yes, ReactJS can be used to create mobile applications using tools such as React Native. React Native allows developers to build mobile apps using JavaScript, and it supports both iOS and Android platforms.
- Overall, ReactJS is a powerful tool for creating fast, efficient, and dynamic web applications, including blogs. With its rich ecosystem of libraries and tools, you can easily create a simple blog or even a complex web application with ReactJS.