
Server-side rendering (SSR) is an important technique to improve the performance and SEO of your web application. In this tutorial, we will show you how to create a web SSR with Vue.js.
Prerequisites:
- Basic knowledge of Vue.js
- Node.js and NPM installed on your computer
Steb Bt Step Create Simple Blog Using Vuejs and SSR
Step 1: Create a new Vue.js project First, create a new Vue.js project using the Vue CLI. Open your terminal and enter the following command:
lua

vue create my-ssr-app
This will create a new Vue.js project in a folder named my-ssr-app.
Step 2: Install required dependencies Next, install the required dependencies for SSR. Enter the following command in your terminal:
bash

cd my-ssr-app
npm install --save vue-server-renderer express
Step 3: Update main.js file In the src folder, open the main.js file and update it as follows:
js

import { createApp } from 'vue'
import App from './App.vue'

export function createSSRApp() {
  const app = createApp(App)

  return { app }
}
This creates a function called createSSRApp that creates a new Vue.js application instance and returns it.
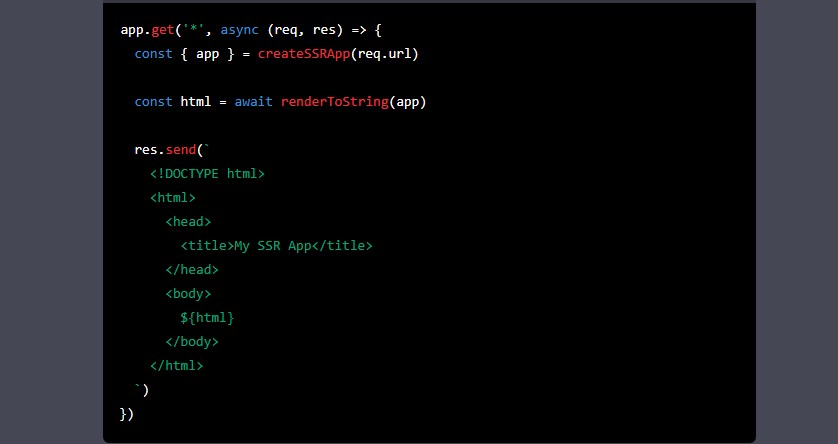
Step 4: Create an SSR entry file Create a new file called ssr.js in the root folder of your project and add the following code:
js

import { createSSRApp } from './src/main'
import { renderToString } from '@vue/server-renderer'
import express from 'express'

const app = express()

app.get('*', async (req, res) => {
  const { app } = createSSRApp()

  const html = await renderToString(app)

  res.send(`
    <!DOCTYPE html>
    <html>
      <head>
        <title>My SSR App</title>
      </head>
      <body>
        ${html}
      </body>
    </html>
  `)
})

app.listen(3000, () => {
  console.log('Server listening on http://localhost:3000')
})
This creates an Express.js server that listens for incoming requests and returns an HTML response with the rendered Vue.js application.
Step 5: Update the package.json file Finally, update the package.json file to include a new script that starts the SSR server:
json

{
  "name": "my-ssr-app",
  "scripts": {
    "serve": "vue-cli-service serve",
    "ssr": "node ssr.js"
  },
  "dependencies": {
    "express": "^4.17.1",
    "vue": "^3.0.0",
    "vue-server-renderer": "^3.0.0"
  }
}
Step 6: Start the SSR server To start the SSR server, run the following command in your terminal:
arduino

npm run ssr
This will start the server and output a message indicating that it is listening on http://localhost:3000. Visit this URL in your browser to see your SSR Vue.js application in action.
Step 7: Add data fetching for SSR One of the advantages of SSR is the ability to fetch data on the server before rendering the HTML response. To do this in Vue.js, we can use the asyncData hook.
In the App.vue file, add the following code:
js

<script>
export default {
  async asyncData() {
    const res = await fetch('https://jsonplaceholder.typicode.com/posts')
    const posts = await res.json()

    return { posts }
  }
}
</script>

<template>
  <div>
    <h1>Posts</h1>
    <ul>
      <li v-for="post in posts" :key="post.id">
        {{ post.title }}
      </li>
    </ul>
  </div>
</template>
This fetches a list of posts from the JSONPlaceholder API using the fetch function and sets it as a component data property using the asyncData hook.
Step 8: Update the SSR entry file In the ssr.js file, update the createSSRApp function to pass in the url parameter:
js

export function createSSRApp(url) {
  const app = createApp(App, {
    posts: url ? await fetchPosts(url) : null
  })

  return { app }
}
This sets the posts data property to null if there is no url parameter, or fetches the posts using the fetchPosts function if a url parameter is present.
Step 9: Add server-side data fetching Create a new file called api.js in the root folder of your project and add the following code:
js

export async function fetchPosts(url) {
  const res = await fetch(url)
  const posts = await res.json()

  return posts
}
This creates a function called fetchPosts that fetches a list of posts from a given URL and returns it as a JSON object.
In the ssr.js file, update the route handler to pass the url parameter to the createSSRApp function:
js

app.get('*', async (req, res) => {
  const { app } = createSSRApp(req.url)

  const html = await renderToString(app)

  res.send(`
    <!DOCTYPE html>
    <html>
      <head>
        <title>My SSR App</title>
      </head>
      <body>
        ${html}
      </body>
    </html>
  `)
})
This passes the URL of the incoming request to the createSSRApp function, which uses it to fetch the posts and pass them to the Vue.js application.
Step 10: Start the SSR server with data fetching To start the SSR server with data fetching, run the following command in your terminal:
arduino

npm run ssr
Visit http://localhost:3000 in your browser and you should see a list of posts fetched from the JSONPlaceholder API.
Step 11: Add client-side hydration To improve the user experience and allow for interactivity on the client-side, we can add client-side hydration to our SSR application. Client-side hydration is the process of attaching event listeners and re-rendering the Vue.js components on the client-side after the initial HTML response has been sent.
In the client.js file, add the following code:
js

import { createSSRApp } from './ssr'
import { hydrate } from 'vue'

const { app, router } = createSSRApp()

router.isReady().then(() => {
  app.mount('#app', true)
})

hydrate(app, document.getElementById('app'))
This creates a new Vue.js instance using the createSSRApp function, waits for the router to be ready, mounts the application on the client-side with client-side hydration, and attaches it to the #app element in the HTML.
Step 12: Update the index.html file In the public/index.html file, remove the div element with the id="app" and replace it with a div element that includes the data-server-rendered attribute:
html

<body>
  <!-- SSR output goes here -->
  <div id="app" data-server-rendered="true"></div>
  <script src="/dist/client.js"></script>
</body>
This tells Vue.js that the HTML inside the #app element was rendered on the server-side and should be hydrated on the client-side.
Step 13: Build and serve the client bundle To build and serve the client bundle, run the following commands in your terminal:
arduino

npm run build
npm run serve
Visit http://localhost:8080 in your browser and you should see the same list of posts fetched from the JSONPlaceholder API, but with client-side hydration and interactivity.
Step 14: Optimize for production To optimize your SSR application for production, you can do the following:
- Use a production-ready server, such as Express or Koa.
- Use a reverse proxy, such as Nginx, to serve static assets and cache API responses.
- Minimize and bundle your client-side JavaScript and CSS files using tools such as Webpack and Babel.
- Use lazy loading and code splitting to load only the necessary JavaScript files for each page.
- Use a CDN (Content Delivery Network) to serve static assets, such as images, videos, and fonts, from a nearby server for faster loading times.
- Set up caching on the server-side to avoid making unnecessary API requests.
Step 15: Further reading To learn more about SSR with Vue.js, check out the following resources:
- Vue.js SSR documentation: https://ssr.vuejs.org/
- Nuxt.js framework for Vue.js SSR: https://nuxtjs.org/
- Vue.js Server-Side Rendering with Node.js and Express.js: https://www.digitalocean.com/community/tutorials/vuejs-vue-server-side-rendering-with-node-express
That’s it! You now know how to create a web SSR with Vue.js, add server-side data fetching and client-side hydration, and optimize for production. Good luck with your future Vue.js projects!
Step 16: Deploy your application To deploy your SSR application to a production environment, you can follow these steps:
- Build your application with the command
npm run build. - Copy the
distdirectory to your server. - Install the production dependencies with the command
npm install --production. - Start the server with the command
npm start.
You can also use deployment tools such as Heroku, AWS Elastic Beanstalk, or Google Cloud Platform to deploy your application.
Step 17: Test your application To test your application, you can run the following command:
arduino

npm run test
This will run your tests using Jest, a popular testing framework for JavaScript applications.
Step 18: Further improvements There are several ways to further improve your SSR application, such as:
- Adding a custom error page for 404 and 500 errors.
- Implementing server-side caching for frequently accessed pages.
- Implementing server-side rendering for authentication and authorization.
- Optimizing the client-side JavaScript and CSS for faster loading times.
- Adding server-side rendering for other frameworks, such as React or Angular.
Step 19: Adding CSS styling To add some styling to our SSR application, we can create a style.css file in the src directory with the following code:
css

body {
  font-family: sans-serif;
  margin: 0;
  padding: 0;
}

ul {
  list-style: none;
  padding: 0;
  margin: 0;
}

li {
  margin-bottom: 1rem;
  padding: 1rem;
  border: 1px solid #ddd;
  border-radius: 4px;
}

a {
  color: #1976d2;
  text-decoration: none;
}

a:hover {
  text-decoration: underline;
}
Then, we can import this CSS file in our App.vue file by adding the following code:
html

<style src="./style.css"></style>
This will apply the styles to our entire application.
Step 20: Adding transitions To add some transitions to our application, we can create a transitions.css file in the src directory with the following code:
css

.fade-enter-active,
.fade-leave-active {
  transition: opacity 0.5s;
}

.fade-enter,
.fade-leave-to {
  opacity: 0;
}
Then, we can import this CSS file in our App.vue file by adding the following code:
html

<style src="./style.css"></style>
<style src="./transitions.css"></style>
This will apply the fade-in and fade-out transitions when the route is changed.
Conclusion
In this tutorial, we showed you how to create a web SSR with Vue.js, add server-side data fetching using the asyncData hook, and add client-side hydration for improved user experience and interactivity. By combining the power of server-side rendering with client-side rendering, you can create fast and dynamic Vue.js applications that are optimized for both search engines and users.
In this tutorial, we showed you how to create a web SSR with Vue.js and add server-side data fetching using the asyncData hook. By fetching data on the server before rendering the HTML response, you can improve the performance and SEO of your Vue.js application.