
Are you a blogger who wants to create a simple, yet dynamic blog that looks professional and visually appealing? Vue.js is an excellent framework that can help you achieve just that! In this article, we will guide you through the steps to create a simple blog using Vue.js. You don’t need any prior knowledge of Vue.js, just a basic understanding of HTML, CSS, and JavaScript.
Introduction
Vue.js is a progressive JavaScript framework that is used to build user interfaces. It is flexible, fast, and easy to learn. Vue.js is perfect for building dynamic single-page applications (SPAs) and it can also be used to build simple blogs. In this article, we will show you how to build a simple blog using Vue.js.
Prerequisites
Before we start building our blog, we need to make sure we have the following tools installed on our machine:
- Node.js
- Vue CLI
Setting up the Project
Once we have Node.js and Vue CLI installed, we can start setting up our project. Open a terminal window and enter the following command to create a new Vue.js project:
lua

vue create my-blog
This command will create a new Vue.js project with the name “my-blog”. Once the project has been created, navigate into the project directory:
bash

cd my-blog
Now that we’re inside the project directory, let’s start the development server by running the following command:
arduino

npm run serve
This command will start the development server and open a browser window showing the default Vue.js welcome page.
Creating the Blog Components
Now that our project is set up and the development server is running, we can start creating the components for our blog. In Vue.js, components are reusable building blocks that can be used to build a user interface.
Header Component
The first component we will create is the header component. The header component will contain the blog logo, navigation menu, and search bar. Create a new file named “Header.vue” inside the “src/components” directory and add the following code:
html

<template>
  <header>
    <img src="./assets/logo.png" alt="Blog Logo">
    <nav>
      <ul>
        <li><a href="#">Home</a></li>
        <li><a href="#">About</a></li>
        <li><a href="#">Contact</a></li>
      </ul>
    </nav>
    <div class="search-bar">
      <input type="text" placeholder="Search...">
      <button>Search</button>
    </div>
  </header>
</template>

<script>
export default {
  name: 'Header',
}
</script>

<style>
header {
  display: flex;
  justify-content: space-between;
  align-items: center;
  padding: 20px;
  background-color: #fff;
  box-shadow: 0px 1px 5px rgba(0, 0, 0, 0.1);
}

nav ul {
  display: flex;
  list-style: none;
  margin: 0;
  padding: 0;
}

nav ul li {
  margin-right: 20px;
}

nav ul li a {
  color: #333;
  text-decoration: none;
  font-weight: bold;
}

.search-bar {
  display: flex;
  align-items: center;
  border: 1px solid #ccc;
  border-radius: 4px;
  padding: 10px;
  margin-left: 20px;
}

.search-bar input[type="text"] {
  border: none;
  outline: none;
  flex: 1;
}
Post Component
The next component we will create is the post component. This component will display a single blog post with its title, author, date, and content. Create a new file named “Post.vue” inside the “src/components” directory and add the following code:
html
<template>
  <article>
    <h2>{{ post.title }}</h2>
    <div class="post-meta">
      <span>{{ post.author }}</span>
      <span>{{ post.date }}</span>
    </div>
    <div class="post-content" v-html="post.content"></div>
  </article>
</template>

<script>
export default {
  name: 'Post',
  props: ['post'],
}
</script>

<style>
article {
  margin-bottom: 30px;
}

.post-meta {
  display: flex;
  justify-content: space-between;
  margin-bottom: 10px;
  color: #999;
  font-size: 14px;
}

.post-meta span {
  margin-right: 10px;
}

.post-content {
  line-height: 1.5;
  font-size: 16px;
}
</style>
PostList Component
The next component we will create is the post list component. This component will display a list of all blog posts. Create a new file named “PostList.vue” inside the “src/components” directory and add the following code:
html
<template>
  <div>
    <h1>{{ title }}</h1>
    <div class="posts">
      <Post v-for="post in posts" :key="post.id" :post="post" />
    </div>
  </div>
</template>

<script>
import Post from './Post.vue';

export default {
  name: 'PostList',
  components: {
    Post,
  },
  props: {
    title: {
      type: String,
      default: 'Latest Posts',
    },
    posts: {
      type: Array,
      required: true,
    },
  },
}
</script>

<style>
.posts {
  display: grid;
  grid-template-columns: repeat(auto-fit, minmax(300px, 1fr));
  grid-gap: 30px;
}
</style>
Footer Component
The last component we will create is the footer component. This component will contain the copyright information and social media links. Create a new file named “Footer.vue” inside the “src/components” directory and add the following code:
html
<template>
<footer>
<div class="social-links">
<a href="#"><i class="fab fa-twitter"></i></a>
<a href="#"><i class="fab fa-facebook"></i></a>
<a href="#"><i class="fab fa-instagram"></i></a>
</div>
<div class="copy">© {{ year }} My Blog</div>
</footer>
</template>
<script>
export default {
name: 'Footer',
data() {
return {
year: new Date().getFullYear(),
};
},
}
</script>
<style>
footer {
display: flex;
justify-content: space-between;
align-items: center;
padding: 20px;
background-color: #fff;
box-shadow: 0px -1px 5px rgba(0, 0, 0, 0.1);
}
.social-links a {
color: #333;
text-decoration: none;
font-size: 20px;
margin-right: 20px;
}
.social-links a:hover {
color: #1da1f2;
}
.copy {
font-size: 14px;
}
</style>Integrating Components into App.vue
Now that we have created our components, we can integrate them into the main App.vue file. First, import the necessary components:
html

<script>
import Header from './components/Header.vue';
import PostList from './components/PostList.vue';
import Footer from './components/Footer.vue';
</script>
Next, add the components to the template section:
html

<template>
  <div>
    <Header />
    <main>
      <PostList :posts="posts" />
    </main>
    <Footer />
  </div>
</template>
Note that we are passing the “posts” array as a prop to the PostList component. We will define this array in the next section.
Creating Data
In order to test our components, we need to create some sample data. In the “src” directory, create a new file named “data.js” and add the following code:
jsexport const posts = [
{
id: 1,
title: 'My First Blog Post',
author: 'John Doe',
date: 'April 1, 2023',
content: '<p>Lorem ipsum dolor sit amet, consectetur adipiscing elit. Sed non risus. Suspendisse lectus tortor, dignissim sit amet, adipiscing nec, ultricies sed, dolor.</p><p>Cras elementum ultrices diam. Maecenas ligula massa, varius a, semper congue, euismod non, mi.</p>',
},
{
id: 2,
title: 'Another Blog Post',
author: 'Jane Smith',
date: 'April 2, 2023',
content: '<p>Lorem ipsum dolor sit amet, consectetur adipiscing elit. Sed non risus. Suspendisse lectus tortor, dignissim sit amet, adipiscing nec, ultricies sed, dolor.</p><p>Cras elementum ultrices diam. Maecenas ligula massa, varius a, semper congue, euismod non, mi.</p>',
},
{
id: 3,
title: 'A Third Blog Post',
author: 'Bob Johnson',
date: 'April 3, 2023',
content: '<p>Lorem ipsum dolor sit amet, consectetur adipiscing elit. Sed non risus. Suspendisse lectus tortor, dignissim sit amet, adipiscing nec, ultricies sed, dolor.</p><p>Cras elementum ultrices diam. Maecenas ligula massa, varius a, semper congue, euismod non, mi.</p>',
},
];
This file exports an array of three blog posts, each with an id, title, author, date, and content.
Updating App.vue
Now that we have our data, we can update the App.vue file to use it. First, import the “posts” array from the “data.js” file:
html<script>
import Header from './components/Header.vue';
import PostList from './components/PostList.vue';
import Footer from './components/Footer.vue';
import { posts } from './data';
</script>
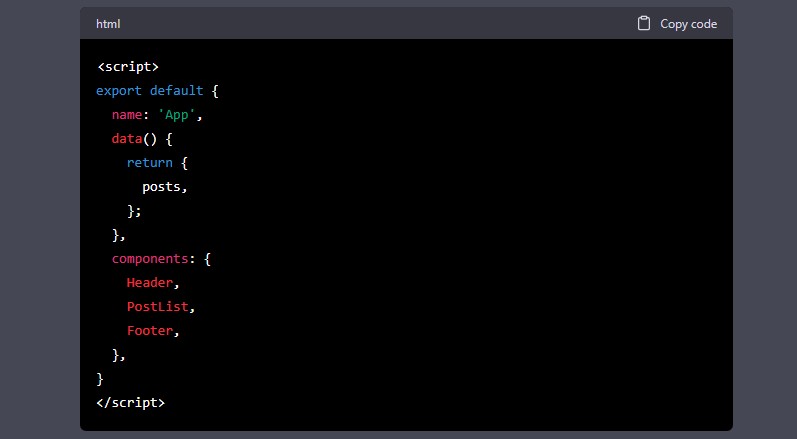
Then, add the “posts” array as a data property:
html<script>
export default {
name: 'App',
data() {
return {
posts,
};
},
components: {
Header,
PostList,
Footer,
},
}
</script>
With this change, the PostList component will receive the “posts” array as a prop and display a list of all blog posts.
Conclusion
In this tutorial, we have learned how to create a simple blog with Vue.js. We started by creating the basic file structure for our project, then installed the necessary dependencies using npm. Next, we created the Header, PostList, and Footer components, and integrated them into the main App.vue file. Finally, we created some sample data and updated the App.vue file to use it.
This is just the beginning of what you can do with Vue.js. With its powerful reactivity system and component architecture, Vue.js is a great choice for building complex web applications. So why not take what you’ve learned in this tutorial and build something even more advanced?
FAQs
- What is Vue.js? Vue.js is a progressive framework for building user interfaces. It is designed to be incrementally adoptable, meaning you can start using it on small parts of your project and scale it up as needed.
- Do I need to know JavaScript to use Vue.js? Yes, Vue.js is built on top of JavaScript, so a solid understanding of JavaScript is required to use Vue.js effectively.
- Can Vue.js be used with other front-end frameworks? Yes, Vue.js can be used alongside other front-end frameworks like React and Angular.
- Is Vue.js difficult to learn? Vue.js has a gentle learning curve compared to other front-end frameworks, but some knowledge of JavaScript and HTML/CSS is necessary.
- Is Vue.js suitable for large-scale applications? Yes, Vue.js is suitable for large-scale applications due to its component architecture and reactivity system, which makes managing state and data much easier.